Enable Wifi in Windows Server 2019
Standard or Data Center Edition
Standard or Data Center Edition
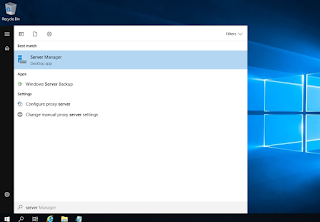
Step 1->Go to Start, type Server Manager and Click on Server Manager
Step 2 -> Select "Add roles and features"
Step 3 -> Click Next
Step 5 -> Click on Select a Server from the Server Pool and Click Next
Step 6 -> Click Next (Nothing to choose here)
Step 7 -> Select Wireless Lan Service and Click Next
Step 7 -> Select restart if required and Click Yes and Click Install then
Step 9 -> In case if you chose close, you can track the status in the server manager by click the top right corner flag:-
Step 10 ->
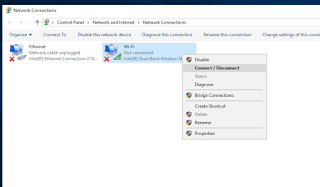
Here we go, if your Wireless Lan Service is installed. In case if it is still not enabled, Please go to the control panel->Network and Internet\Network Connections->Change Adapter Settings.
You will see your wireless is ready to enable or connect to..... Just do it.
You should see your task bar listing all the wireless service you got in and around.
At last, this is me and please visit my profile and mail or call me if you are stuck.


Thank you! This was helpful.
ReplyDeleteHi Al.
ReplyDeleteThis procedure is well known, I have done that with WS2016 and all was OK.
But with same computer, same HW, WS219 lock to airplane mode. (Greyed and "On" in settings and no HW issue in Devices manager)
I am looking forward to a solution.
Merry Xmas.
Great explanation with step by step.
ReplyDeleteWifi and network setup
Thanks. Was banging my head. Really appreciated.
ReplyDeleteWell done, thank you. It really helped me out.
ReplyDeleteI did all of this it still didn't work
ReplyDeleteThank you so much for this wonderful blog post.
ReplyDeleteMCITP Training in Chennai
Thank you very much. Nice job
ReplyDelete